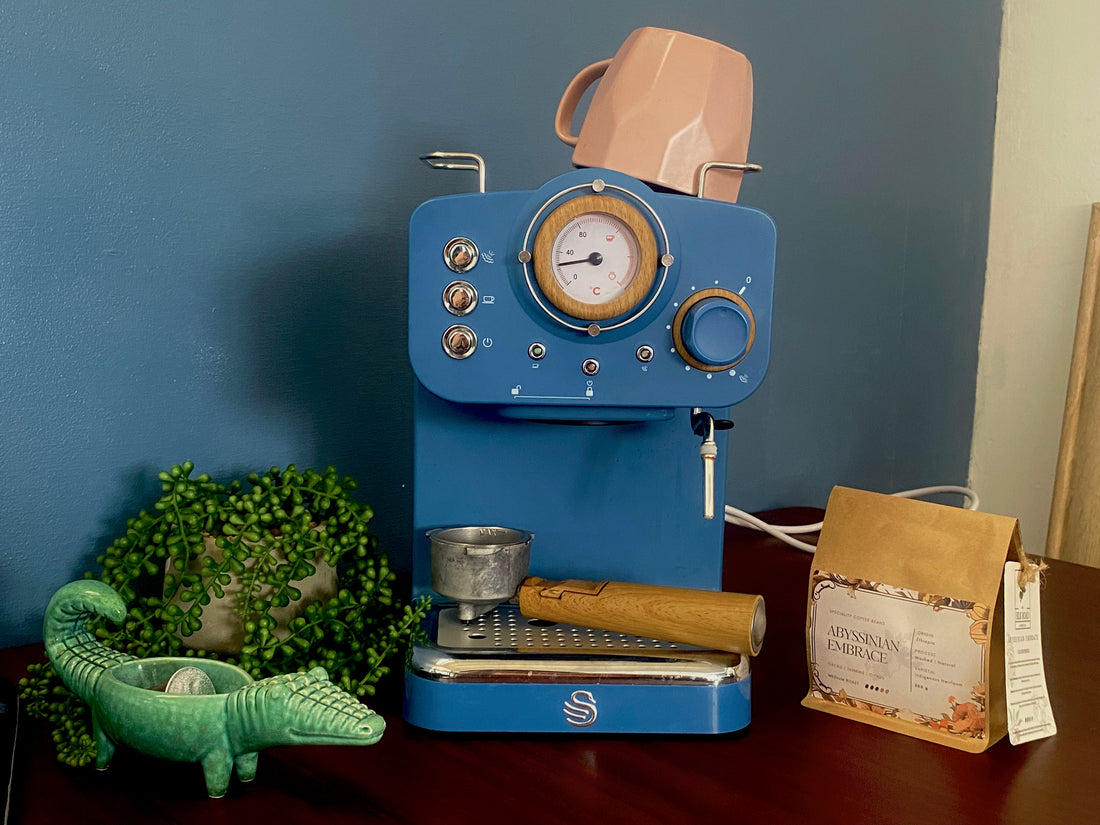
Silk Road Reviews: swan retro coffee machine
A perfect beginner coffee machine
At an affordable price the machine offers a sophisticated Scandinavian-inspired look with many benefits, including:
- 15 bars of pressure
- 1.2 litre tank
- manual espresso pour
- compatible tamper
- quick delivery
- stainless steal and wood design

Our Journey
We first invested in this machine as an aesthetic prop because we loved the design. As we have come to learn, the Swan retro coffee machine is super beginner friendly and pours the perfect Silk Road espresso shot.
The Swan coffee machine work perfectly with our single-origin roasts because of the manual pour feature, allowing us to pour the espresso for exactly 28 seconds every time. This feature, along with the design, has won our heart.
Naturally, the milk frother is not as powerful as those on commercial coffee machines. To combat this, we recommend frothing for 5-8 seconds longer on home coffee machines. You also need to be super patient, as you cannot pour the espresso and froth the milk at the same time due to the single boiler system.

Equipment
Prepare to dive into the beauty of espresso from home, below you will find a step-by-step guide to the Swan machine.
- Good quality coffee beans
- Grinder
- A nice mug
- Stainless steel pitcher with a temperature sticker
- Portafilter
- Stainless steel tamper

Step-by-step guide
The Swan machine pairs perfectly with our speciality roasts, here's what we recommend.
- Grinding the coffee: Begin by finely grinding your coffee. We recommend freshly grounding your coffee before each use but you can also request for it to arrive pre-ground.
- Prepare the machine: Switch on the machine and wait for the coffee icon to flash green, indicating it's ready to use.
- Measuring and tamping: As the coffee machine arrives with a sturdy portafilter, measure out 18g of coffee
- Tamp the coffee ground firmly with a coffee tamper- we recommend investing in a stainless steal tamper as it is more powerful
- And twist the portafilter securely into the machine.
- Brewing the espresso: When you are ready place a cup under the portafilter. Simultaneously start a 28-second timer and press the coffee cup button.
- This will pour the espresso, once the timer reaches 28 seconds press the button again to stop the pour.
- Prepare your milk: pour your milk into a stainless steal pitcher (preferably with a temperature control sticker as a guide) how much milk you pour depends on what drink you are preparing
- Latte: 240 ml of milk
- Cappuccino: 180 ml of milk
- Flat white: 150 ml of milk
- Macchiato: a dollop- but you will have to steam more milk so the steam wand can reach it
- Cortado: 60 ml of milk
- Prepare the steam wand: Once the espresso has been poured place a cloth under the steam wand then press the steam button and wait for the steam icon to flash amber- indicating that the steam is ready.
- Purging the steam wand: Turn the steam wand control to full to release any water- wait till only steam comes out of the wand.
- Turn it off again and on when you are ready to start steaming.
- Steaming the milk: Then place the tip of the steam wand into your milk at an angle, turn the steam control fully, adjust the angle until you see the milk moving in a circular motion- do this for 8 seconds. (this process is called the aeration process- allowing air into the milk to make it frothy)
- For this part its best to have a stainless steel jug with a temperature control sticker- place half of the steam wand into the jug until the temperature reaches between 65° for any espresso based drink however, for the cappuccino this should be around 70°
- Swirl your espresso and milk- then simply mix together :) this part can get quite technical so we will save it for another post!
